TransForce Transverse Appliance
Intermediate Course
Purpose:
- To attain lateral arch development
- To attain sagittal arch development
- To minimize or eliminate Phase II
Instruments & Materials Needed (Prior to Start of Class):
- Band Pusher/Scaler
- Boley Gauge
- Hollow Chop
- Light Wire Plier (Long Bird Beak)
- Mathieu Plier–Hook Tip & Wide Tip
- Pin and Ligature Cutter
- Three Prong Plier
- Weingardt Plier
Materials Provided:
- TransForce Transverse Appliance
- 1/4” Light Elastics
- .012 Long Ligature Wires
- Glide Ties
Step-by-Step:
-
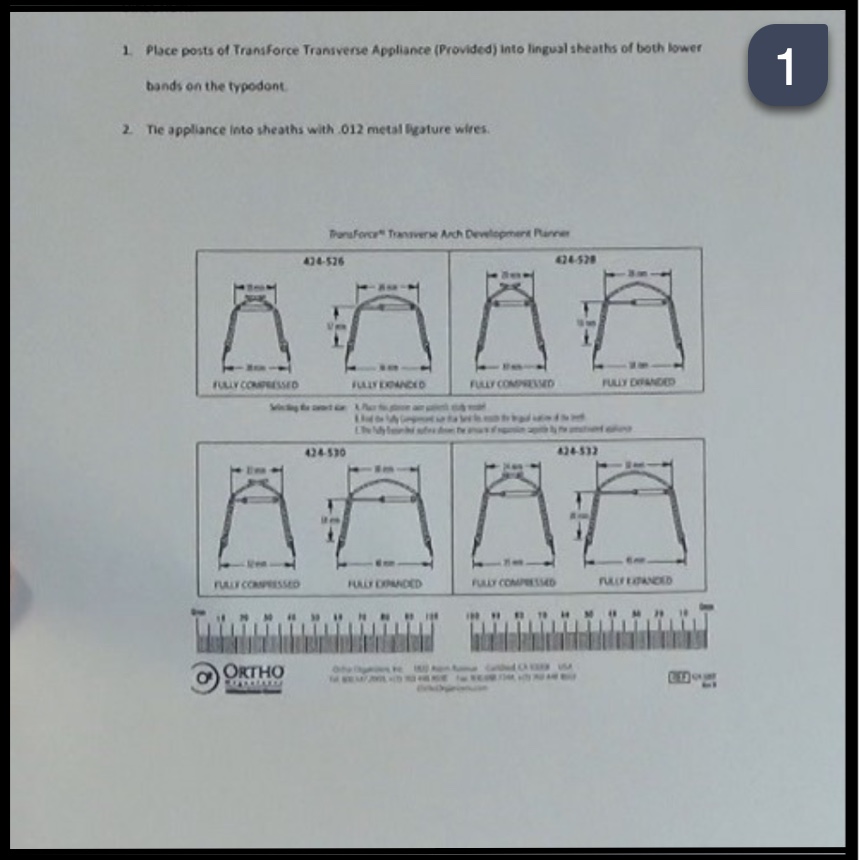
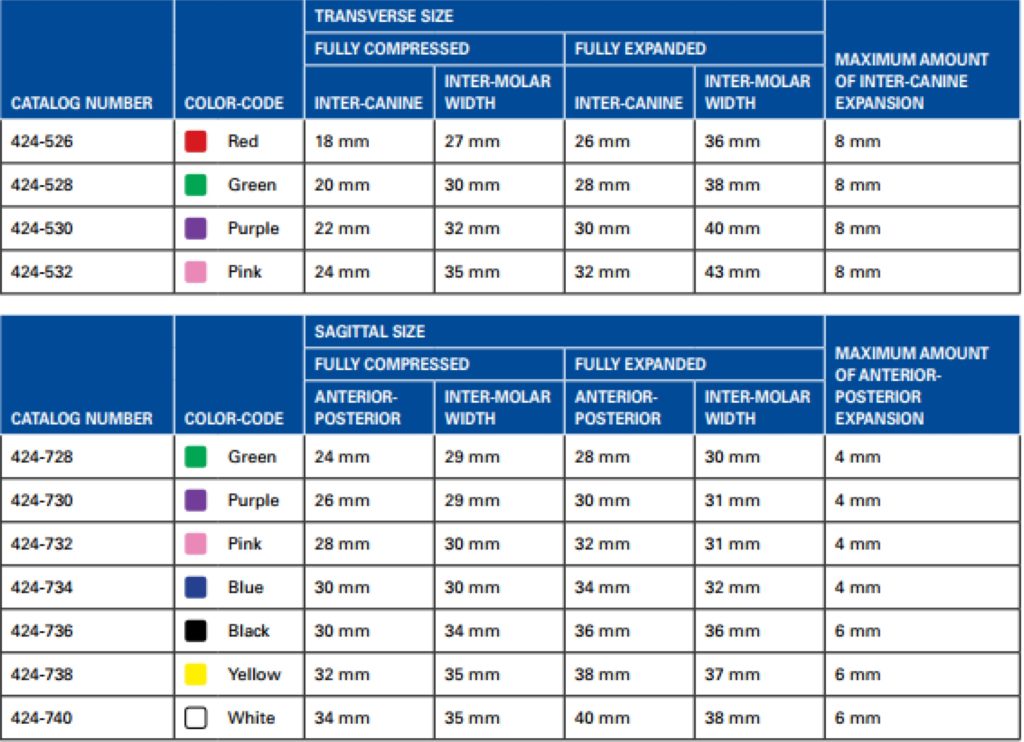
- Refer to this form in the notebook for sizing information.
-
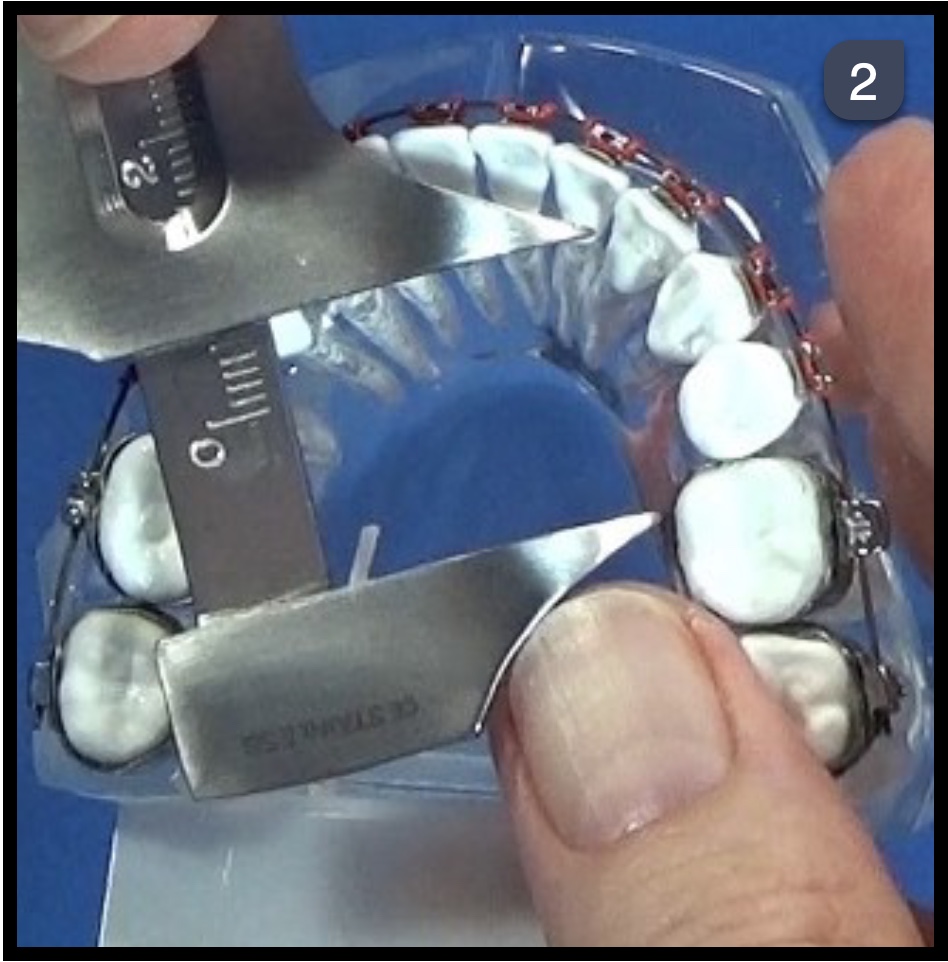
- Use a Boley Gauge to help measure from the mesial of the 1st molar to the middle of the canine.
-
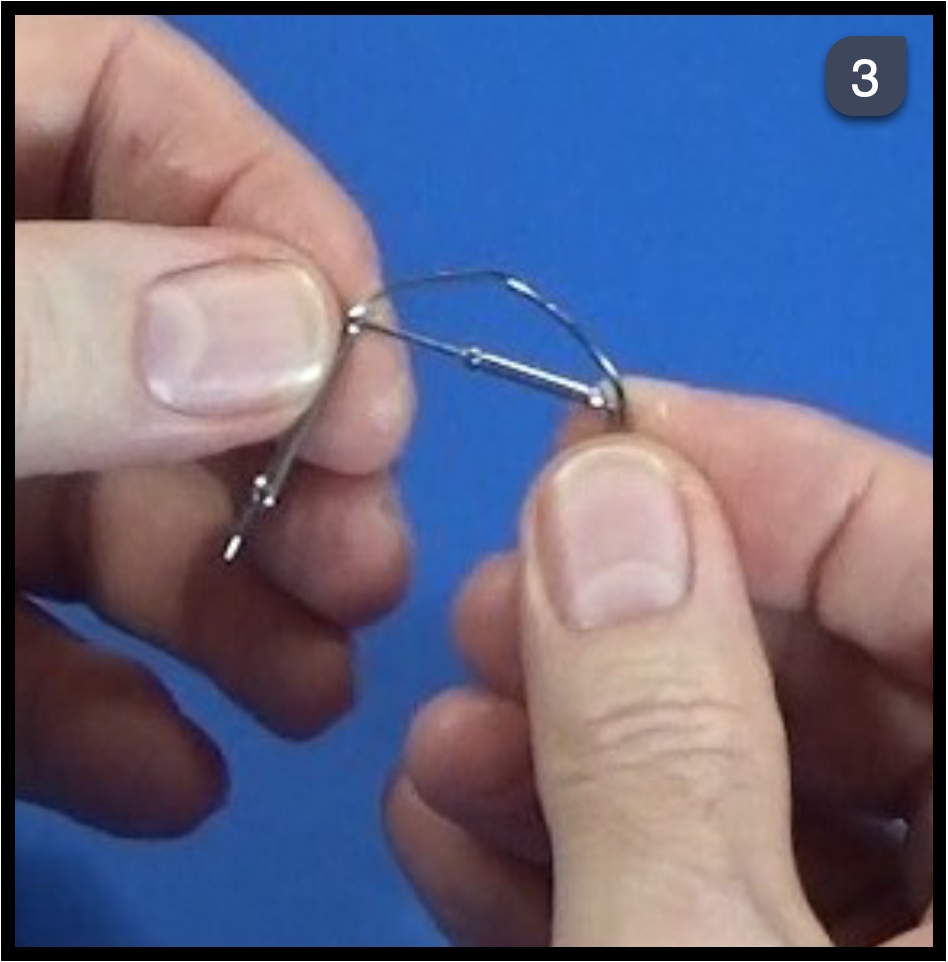
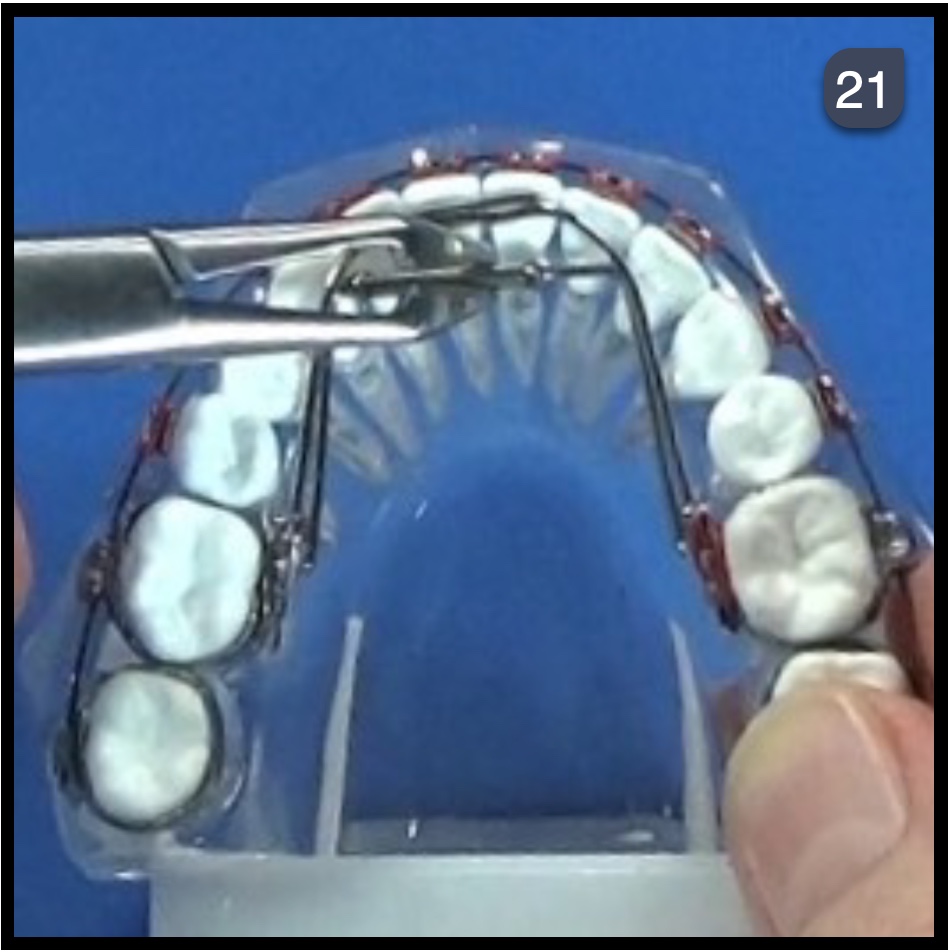
- TransForce Transverse Appliance.
-
- Transverse TransForce Compressed – Activated.
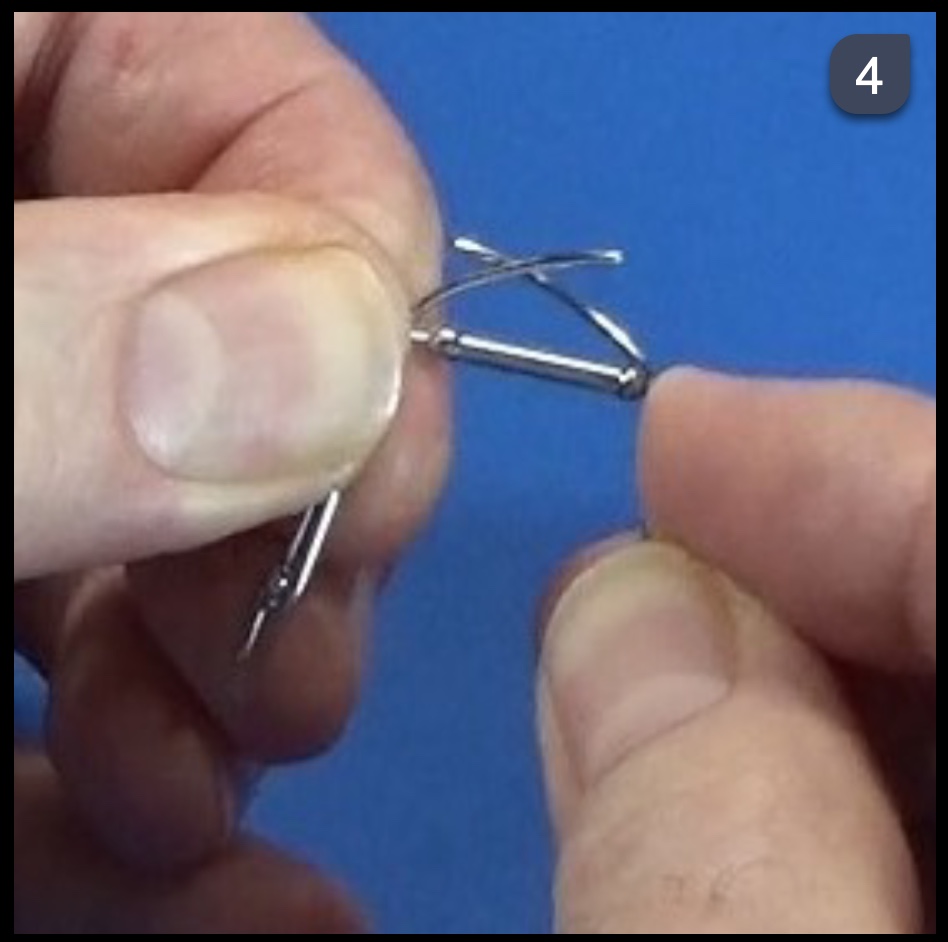
-
- Transverse Trans Force Opened
-
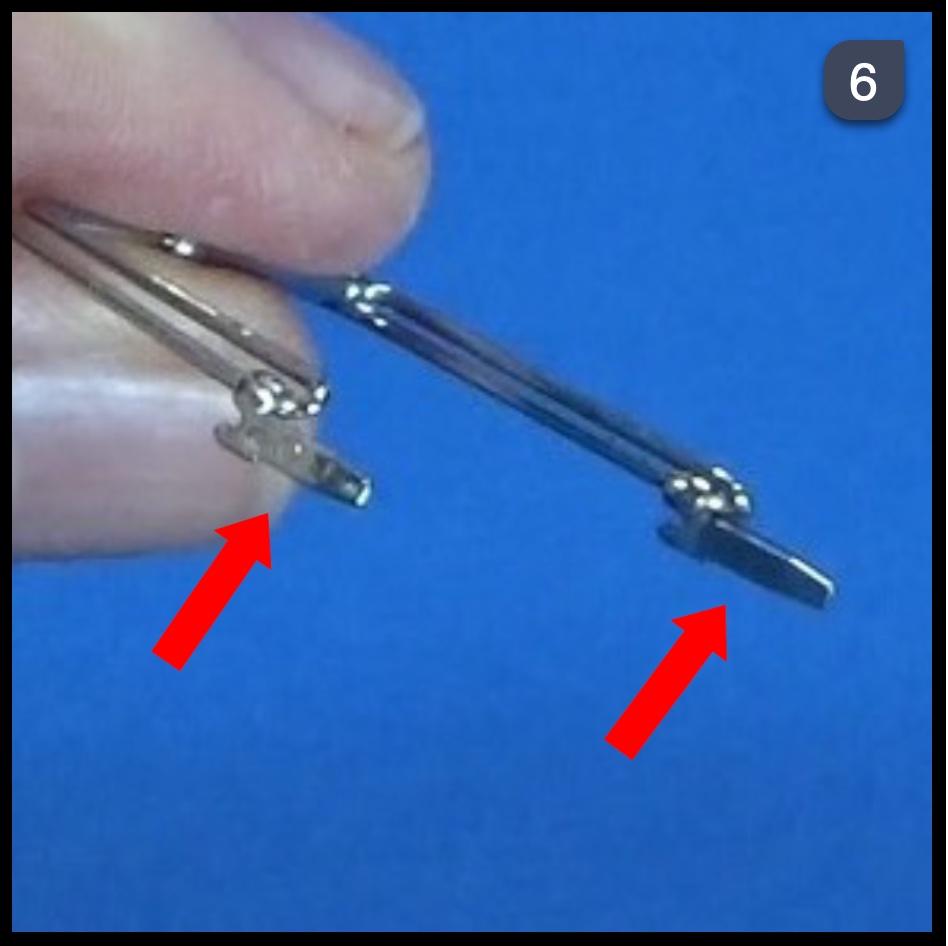
- Distal tabs or ‘tongues” that insert into the lingual sheaths on the 1st molar bands.
-
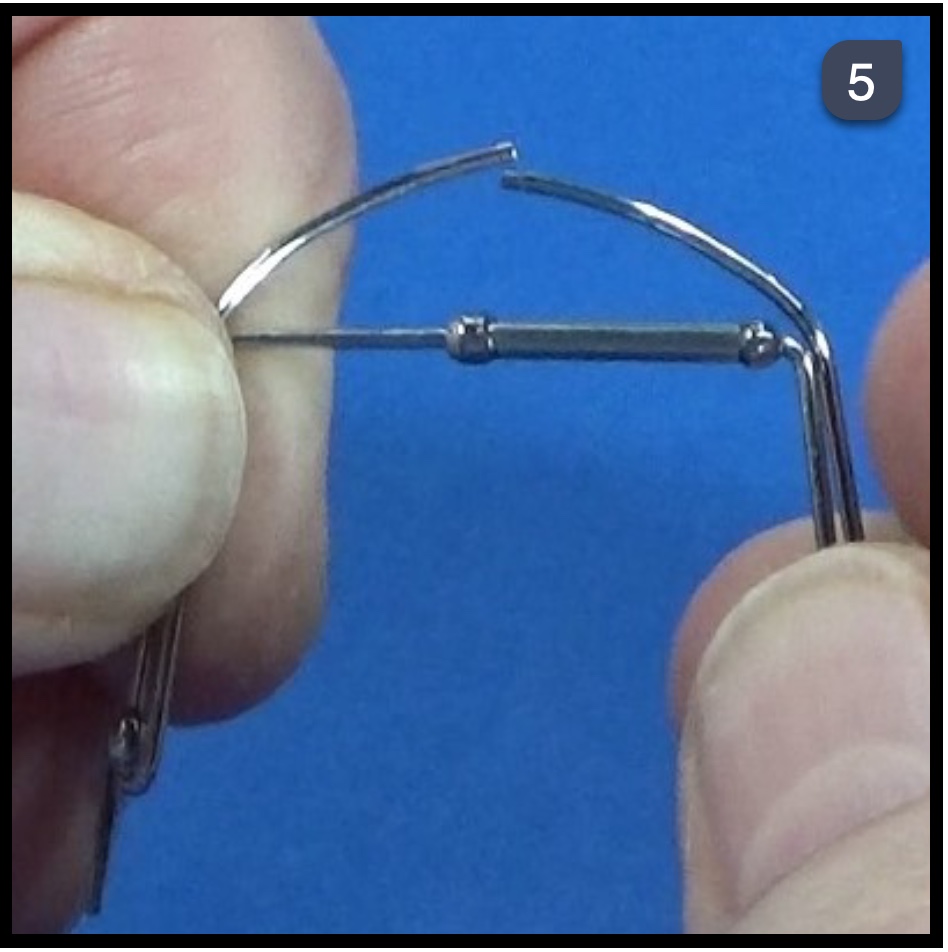
- Make adjustments as needed to the arms on the anterior portion. This can be done using a Hollow Chop Plier.
-
- Adjustments can also be made using a Three Prong Plier.
-
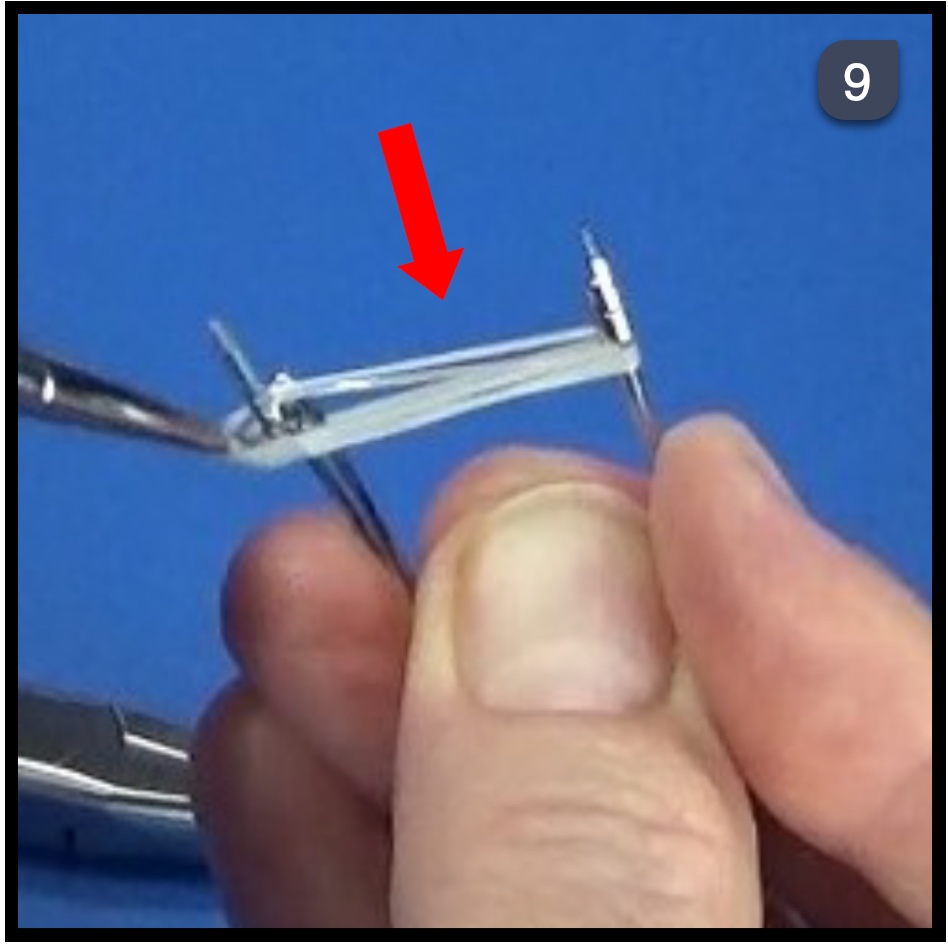
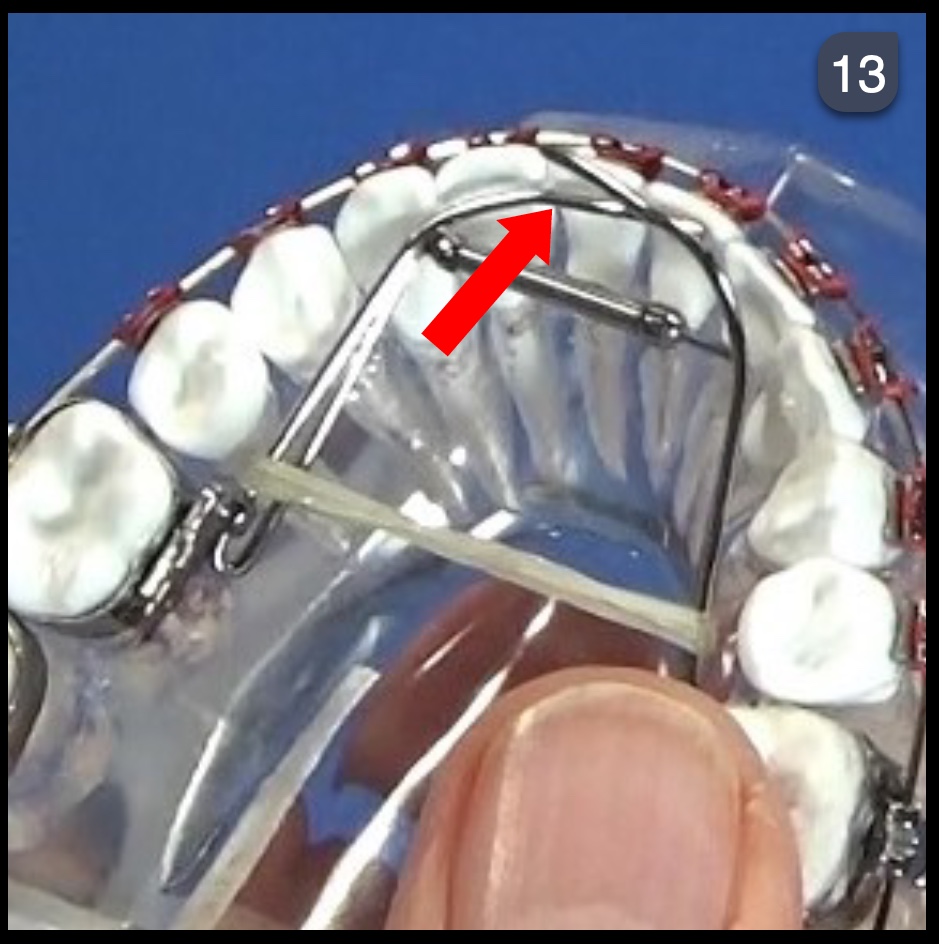
- Prior to inserting the appliance place 2-3 elastics on the distal portion (not on the tabs).
-
- This will ‘deactivate’ it and make it easier to insert the appliance.
-
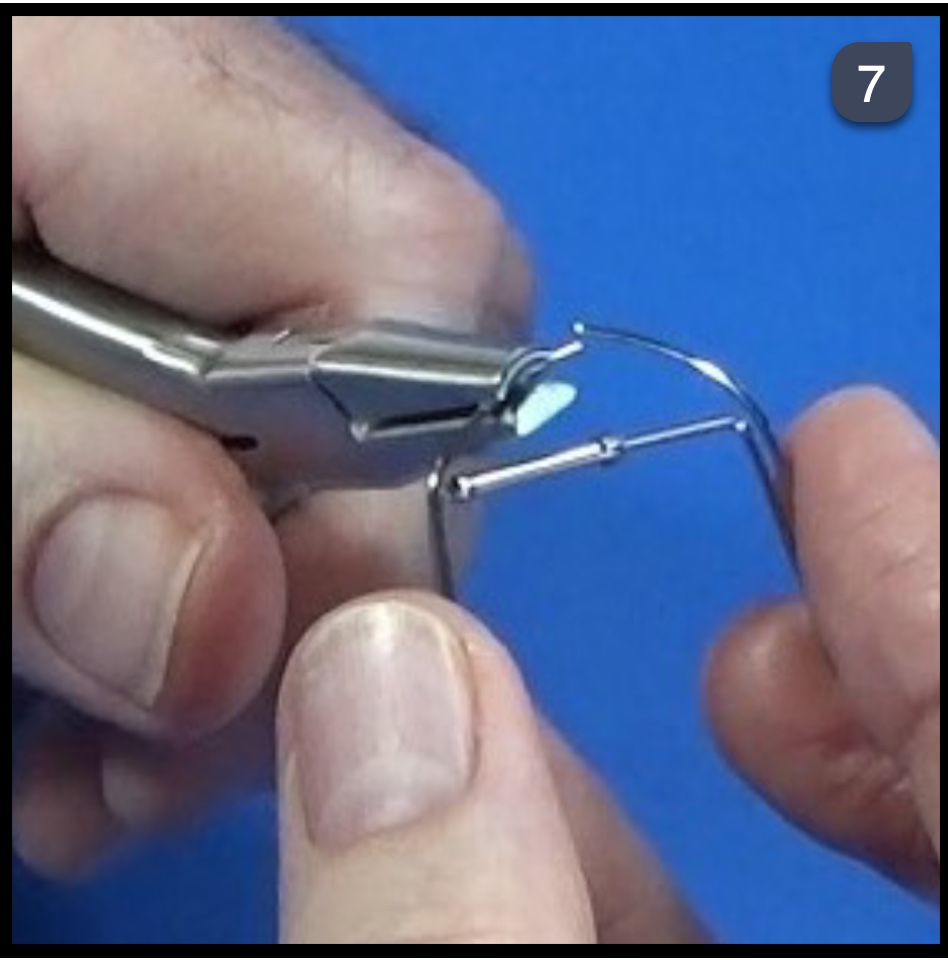
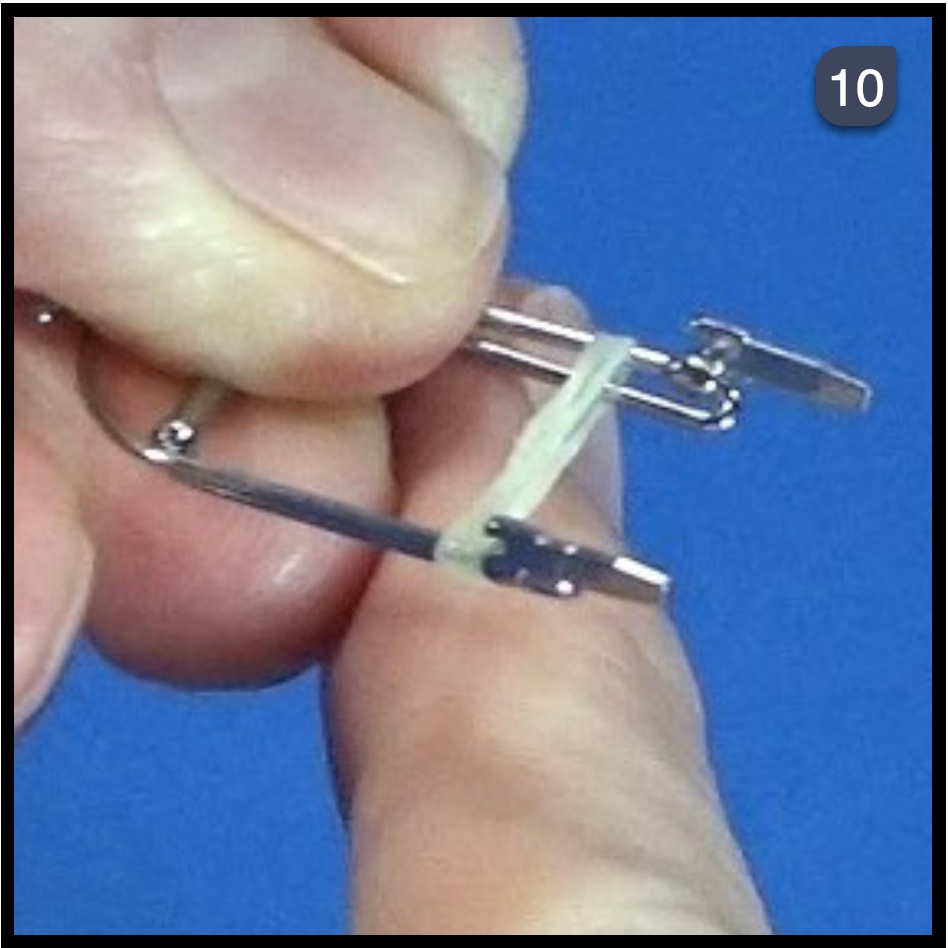
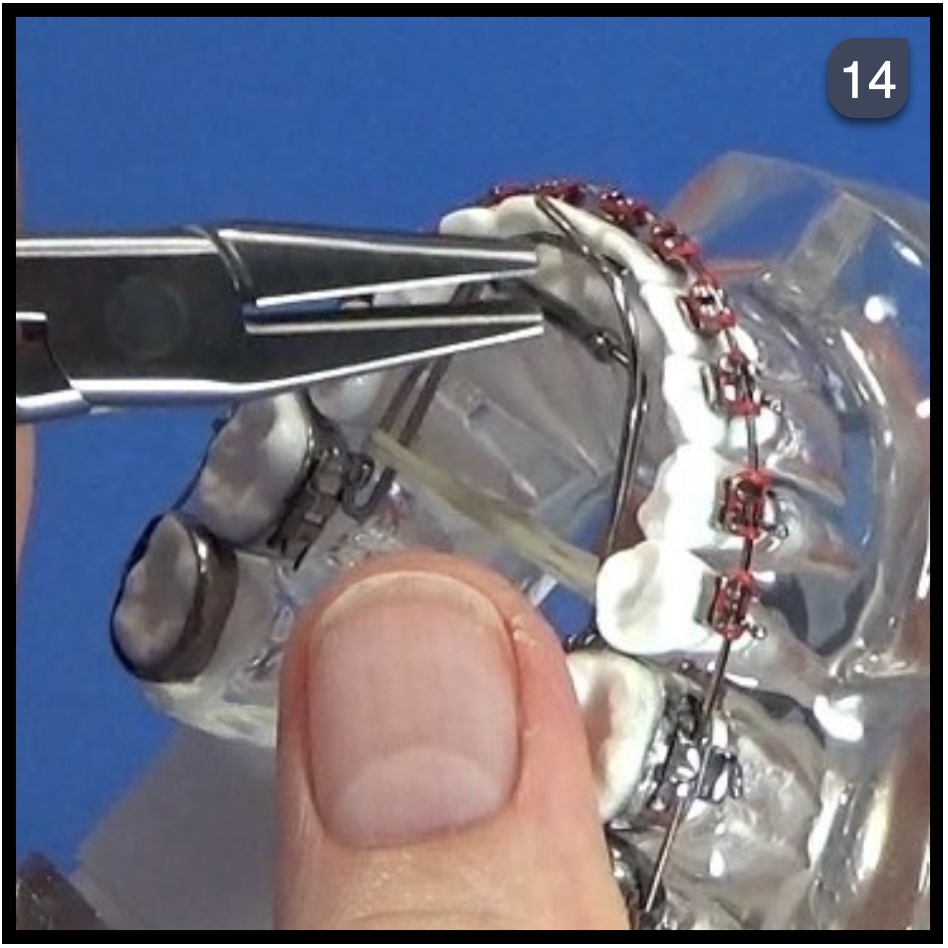
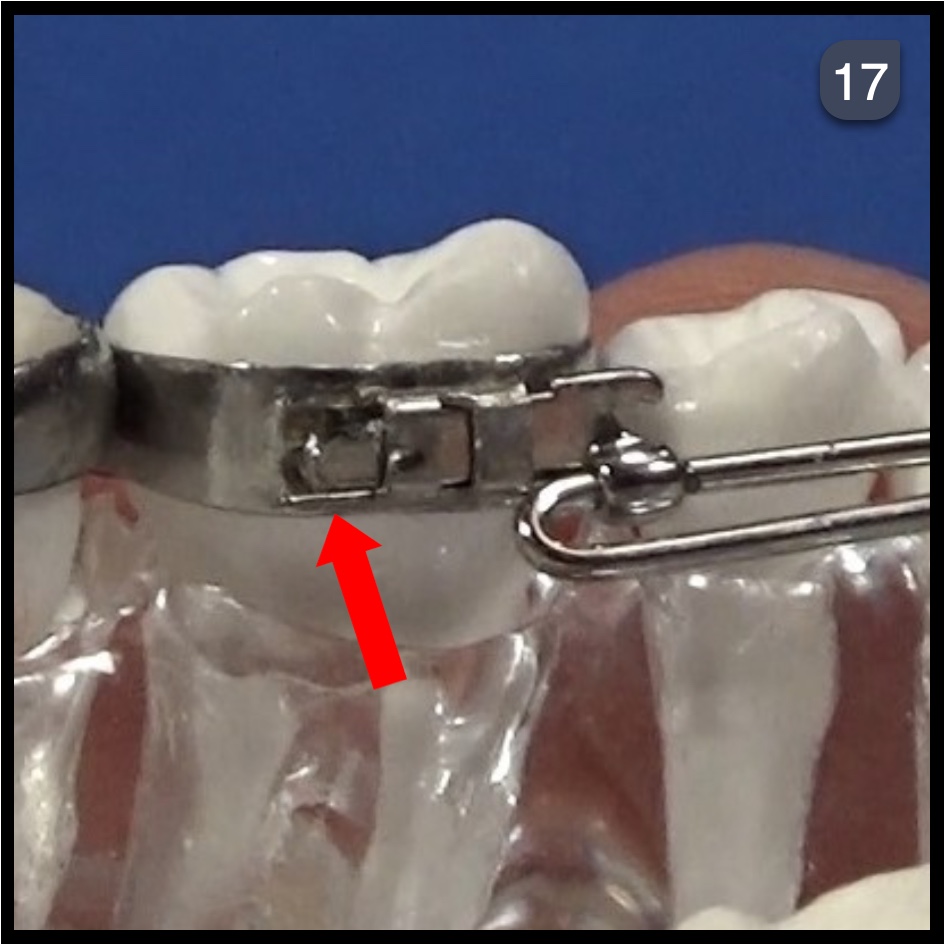
- Use the Weingardt Plier to insert the ‘tongues’ into the lingual sheaths of the 1st molar bands.
-
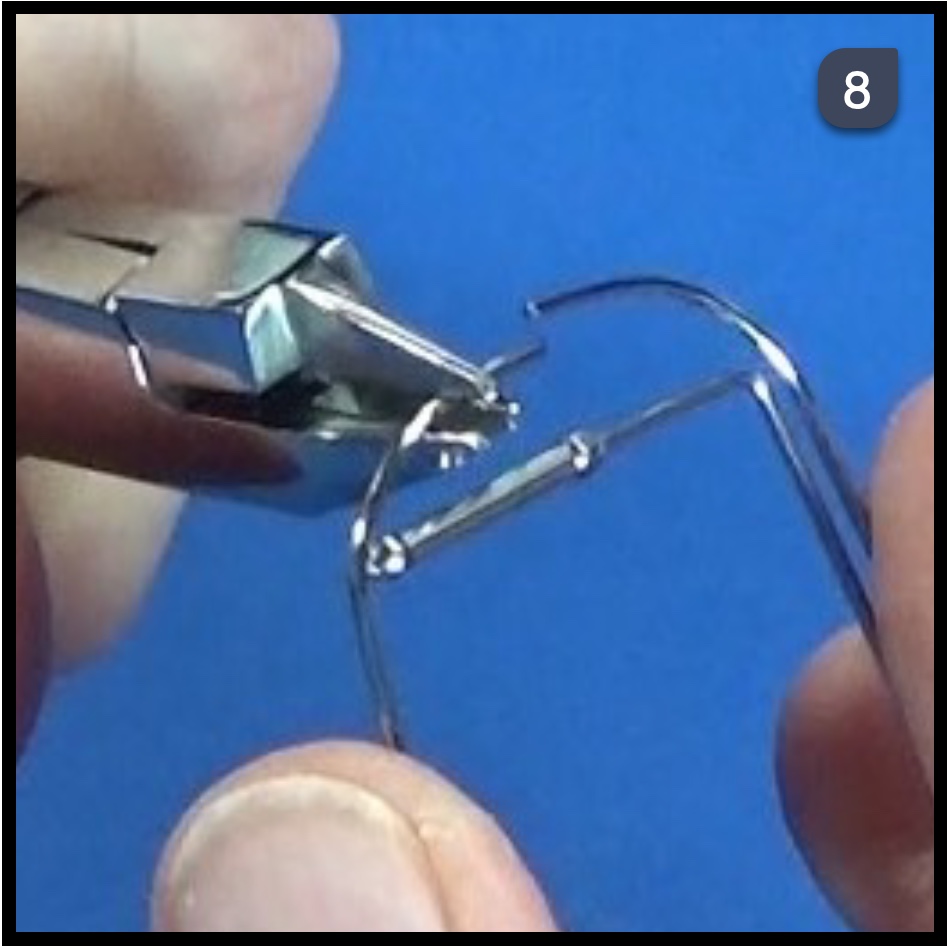
- Place the Weingardt Plier on the tab and distal of the sheath and squeeze. This will help fully seat the appliance.
-
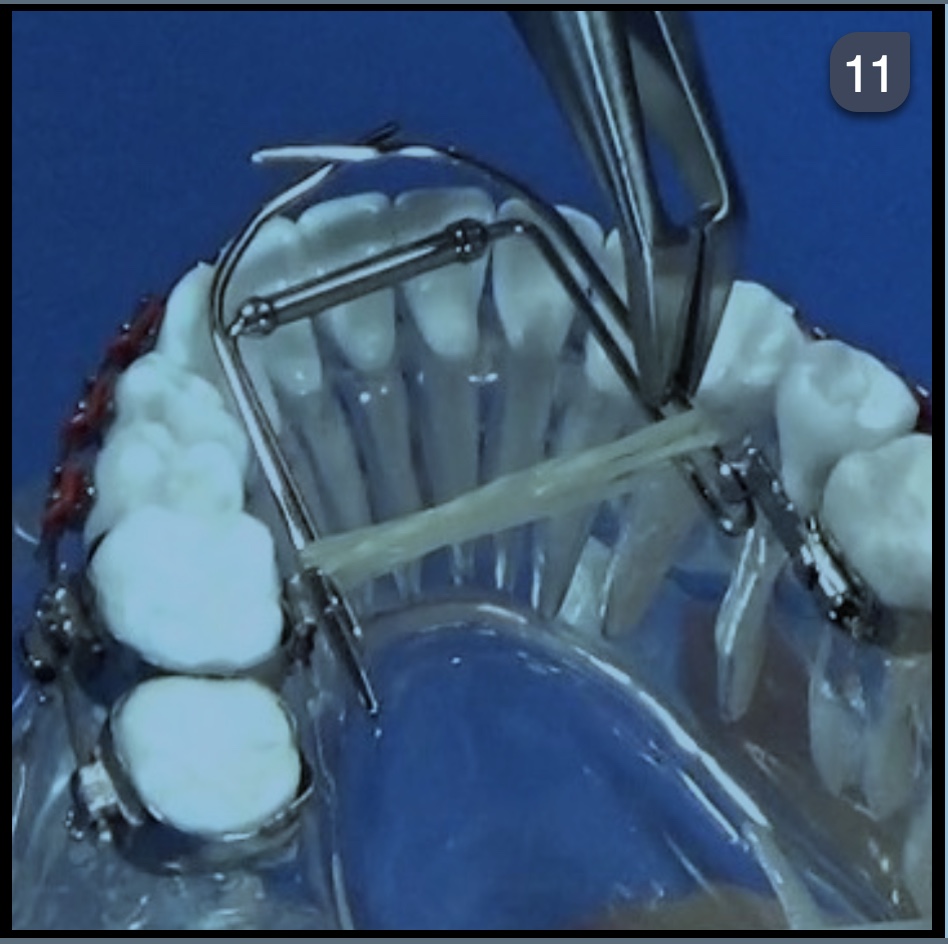
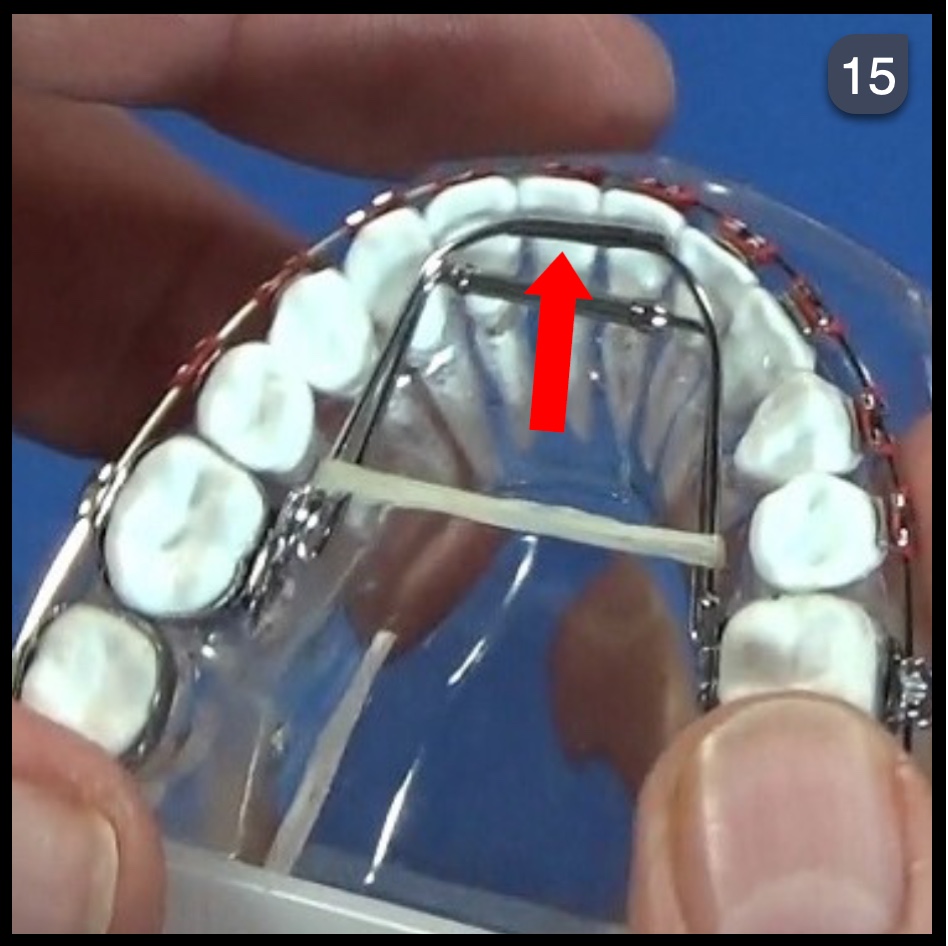
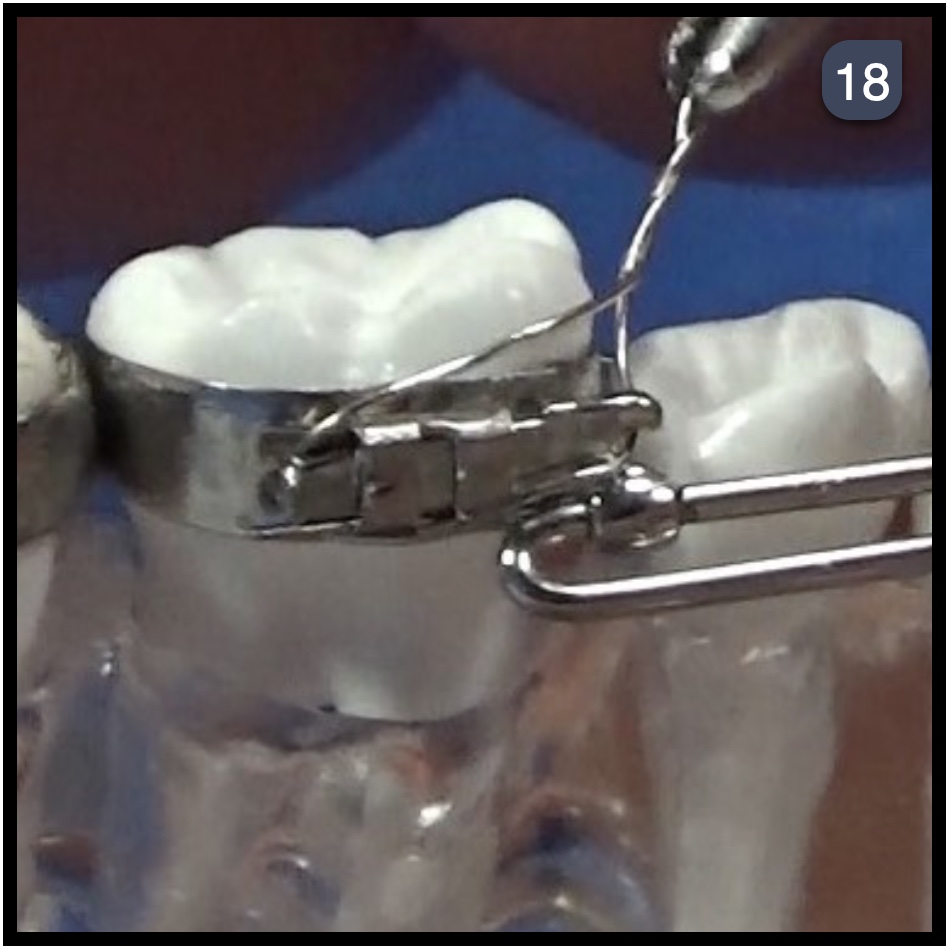
- Appliance is now seated properly. Some adjustments still need to made to the arms.
-
- Adjustments can still me made in-traorally, if needed.
-
- Anterior portion is adjusted and is flush against the teeth for patient comfort.
-
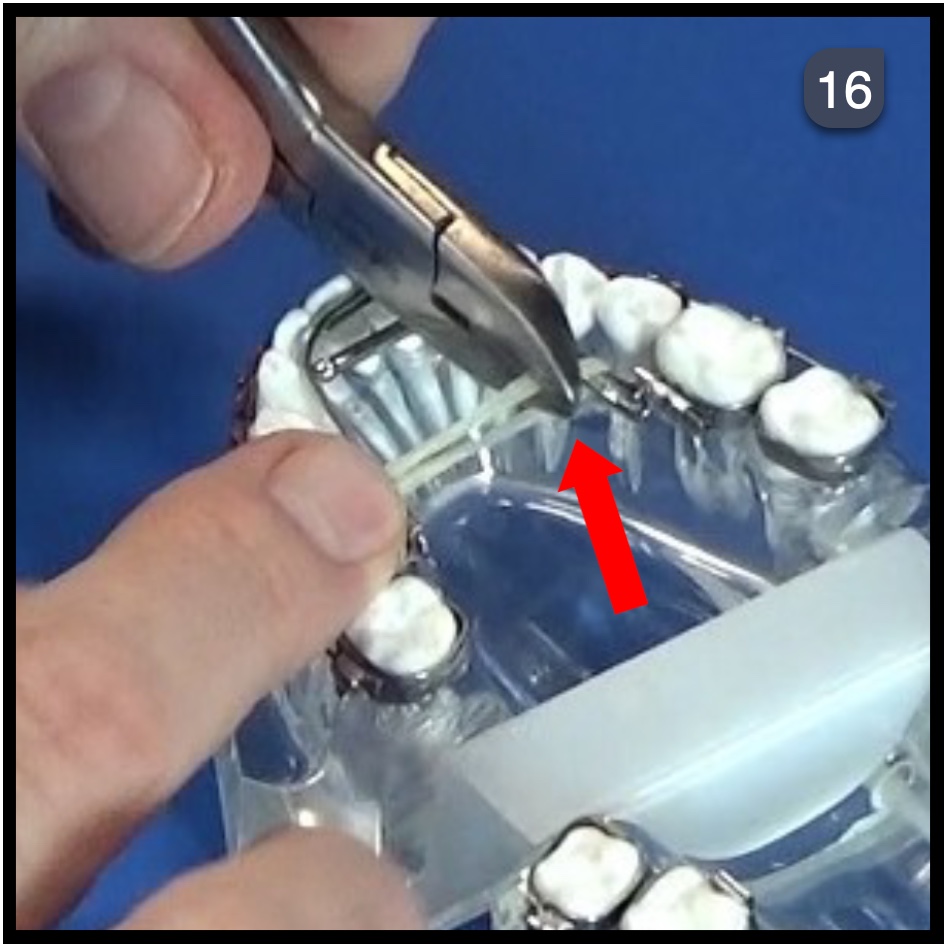
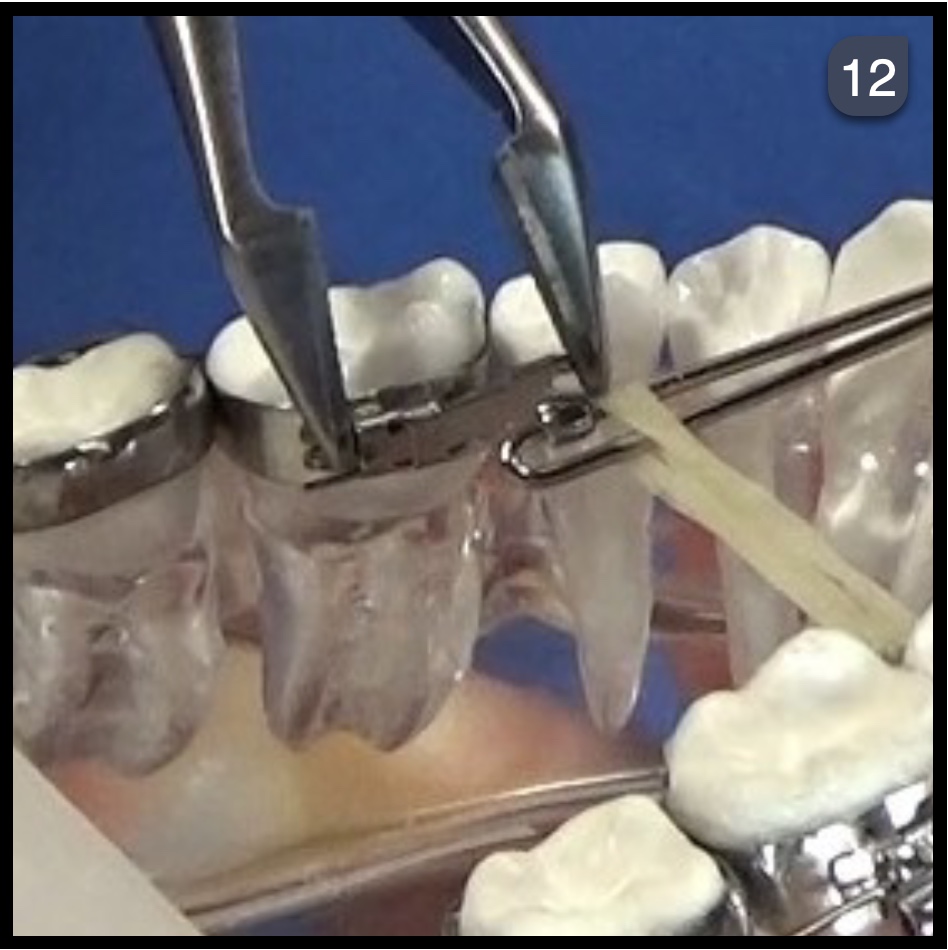
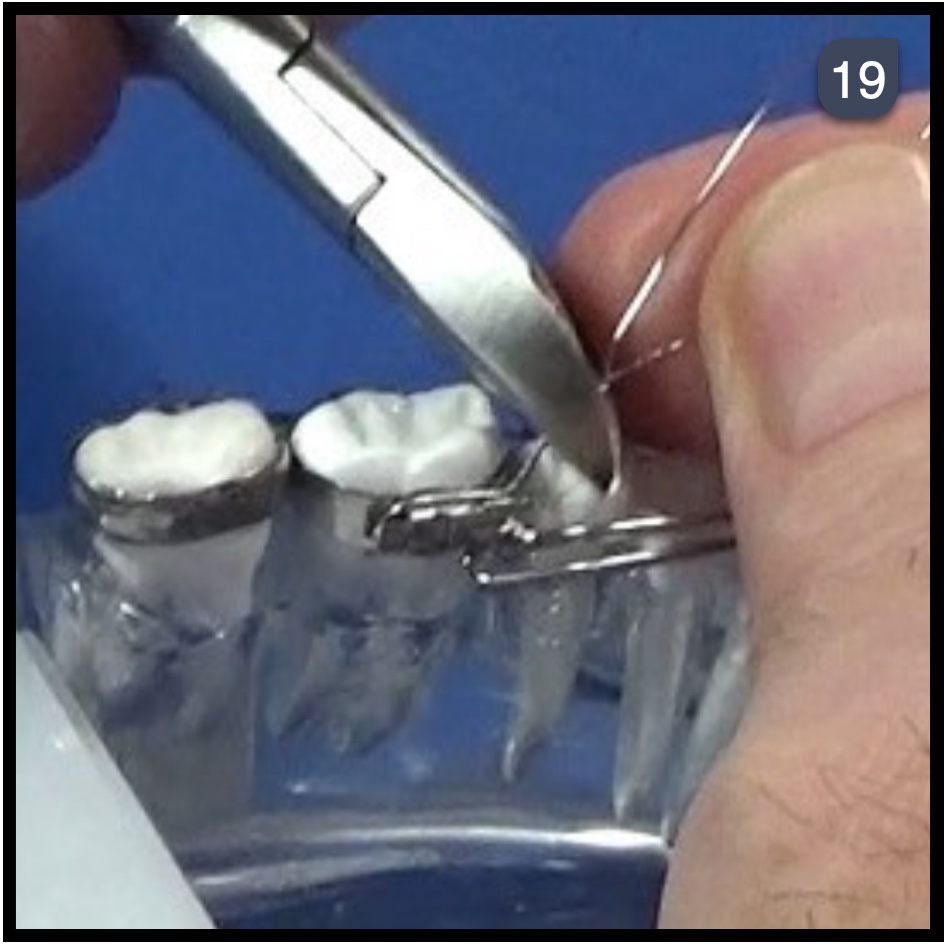
- Use a Pin & Ligature Cutter to re-move the elastics. This will activate the appliance.
-
- Make sure the appliance is fully seated prior to tying it in. It is fully seated if the appliance sticks out distally.
-
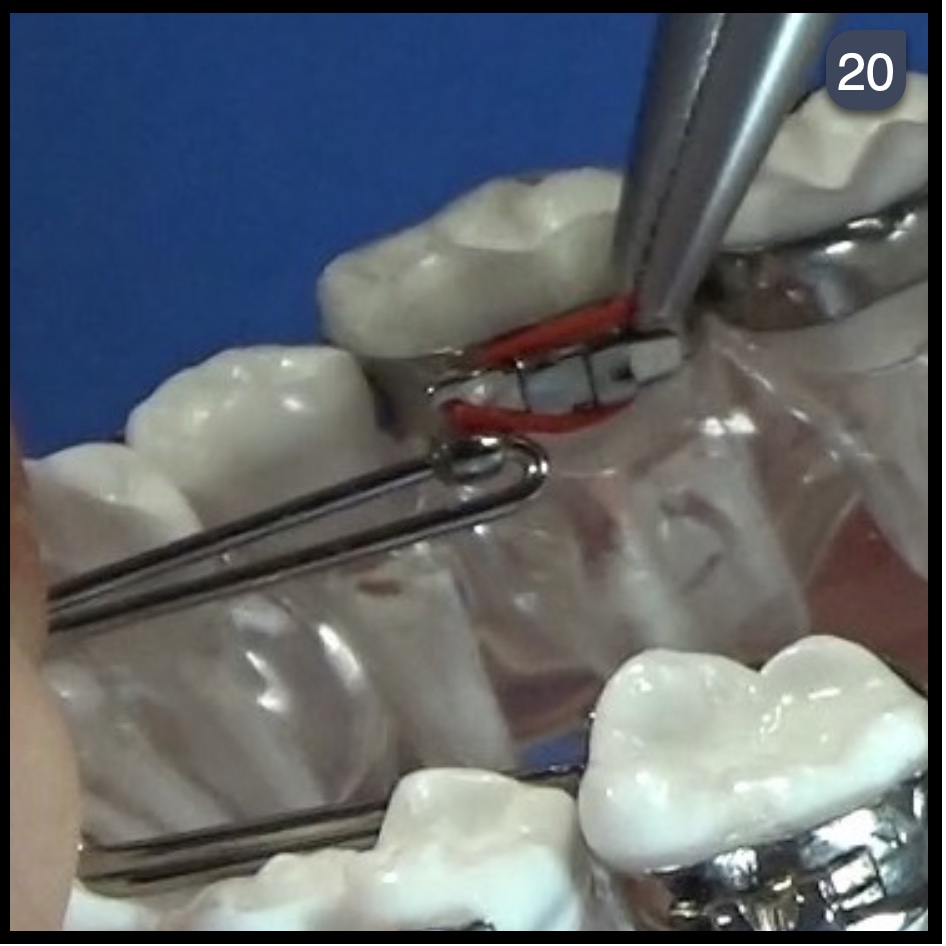
- Secure the appliance using a .012 Long Ligature. Catch the distal tongue and the mesial tab and twist.
-
- Clip and tuck the appliance for patient comfort.
-
- A glide tie can also be used to tie the appliance in.
-
- Once desired expansion has been reached, tightly crimp the anterior sleeve to ‘deactivate’ and maintain. Completed Exercise.
Virtually Invisible Assistance for Arch Development
Designed tor ease of user the TransForce² Arch Developer Appliances are preprogrammed to allow appliances to be placed without laboratory work. Both the Transverse and Sagittal styles may be placed using first molar bands with standard .036 x .072 lingual sheaths.
Each TransForce² Arch Developer Appliance may be easily adjusted per patient. In addition, each expander module contains Nitanium Coil Springs generating approximately 200 grams of gentle biocompatible force.
TransForce² Transverse Arch Developer
The Transverse Appliance has an expansion module to increase the inter-canine width ^expands at the cuspids) and may be used in the upper or lower arch when expansion is required to accommodate crowding in the labial segments, or to correct arch width in constricted arches.
TransForce² Sagittal Arch Developer
The Sagittal Appliance is specifically designed for anterior arch development (creates space by advancing the 3×3 labially} and is often indicated for simultaneous use in both arches. The appliance operates on the slide principle and may be used unilaterally or bilaterally to extend arch length.
The Transverse and Sagittal Appliances arc available in multiple sizes, individually or a starter assortment kit. Best of all. the developers are universal, which allows tor less inventory as they can be used for either upper or lower arch development.
Download or Print Lesson
Check out all the courses offered by the American Orthodontics Society here.<<
